

Business phone setup is where most enterprise IT deployments either build a foundation that scales or create problems they’ll be fixing for years. If you’ve ever inherited a deployment with no documentation, no standard process, and 47 different device models on the network — you already know the difference. This guide is for the IT manager who wants to do it right the first time, or fix it the second time around.
A proper business phone setup isn’t just about getting devices into employees’ hands. It’s about building a process that scales — one you can run for 10 devices or 10,000 without it falling apart. Each step below builds on the last, and skipping any of them is usually where deployments get messy.
Step 1: Choose the Right Devices for Your Business
Device selection is where most business phone setups go wrong before they even start. IT teams either spec too high (paying for flagship hardware nobody needs), too low (cheap devices that create support tickets for the next three years), or they let employees self-select and end up managing a zoo of models. For model-by-model picks, see our guide to the best cell phones for small business.
A few questions worth answering before you pick anything:
- What’s the primary use case — voice, field data entry, mobile POS, remote access, something else?
- Does your MDM platform have any hardware requirements or known compatibility issues?
- Do you need carrier-specific devices, or can you use factory-unlocked hardware across multiple networks?
- What’s your refresh cycle, and how does device cost fit into a 3-year TCO calculation?
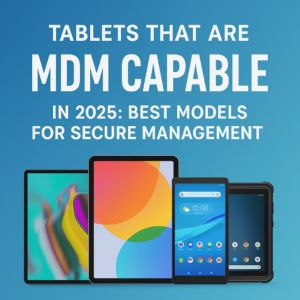
For most mid-market deployments, a standardized mid-range Android fleet — Samsung Galaxy A-series or Motorola business-line devices — hits the right balance of cost, reliability, and MDM support. If your environment is iOS, Apple devices enrolled through Apple Business Manager give you a clean, well-documented enrollment path. Factory-unlocked devices are almost always preferable to carrier-locked hardware — you’re not tied to one network, and you’re not fighting carrier bloatware during enrollment.
For bulk phone procurement at scale, standardizing on one or two models across your fleet is the single biggest thing you can do to simplify staging, support, and refresh cycles.
Check the Android Enterprise Recommended device list if you’re building an Android fleet — it’s a practical shortlist of hardware that’s been validated for enterprise MDM use.
Step 2: Choose and Configure Your MDM Platform
Your MDM platform is the backbone of the whole business phone setup. The device side of this is only as good as your management layer.
The major platforms — Microsoft Intune, Jamf (for Apple-heavy environments), VMware Workspace ONE, and SOTI — each have strengths depending on your OS mix, existing infrastructure, and IT team’s familiarity. There’s no universal right answer, but a few practical notes:
- If your org is already in the Microsoft 365 ecosystem, Intune is usually the path of least resistance.
- If you’re managing a mixed fleet of Android and iOS, make sure your chosen platform handles both without requiring separate consoles.
- Confirm your MDM supports the enrollment methods you’re planning to use before you’re halfway through a rollout.
Configure your baseline policies before a single device is enrolled. App allowlists, password requirements, encryption enforcement, network configurations — all of that should be built and tested in a staging environment first.
Step 3: Business Phone Setup — Picking Your Enrollment Method
Enrollment is where business phone setup either goes smoothly or eats your week. The method you choose matters as much as the platform.
| Method | Best For | OS | Key Advantage |
|---|---|---|---|
| Android Zero-Touch | Large Android fleets | Android | Devices auto-enroll on first power-on — no IT hands-on-keyboard per device |
| Samsung Knox Mobile Enrollment | Regulated industries — healthcare, government, finance | Android (Samsung) | Hardware-level policy enforcement; bulk IMEI upload; works alongside zero-touch |
| Apple Business Manager | iOS/iPadOS fleets | iOS / iPadOS | Devices arrive pre-assigned to MDM; employees power on into a managed state |
Android Zero-Touch Enrollment
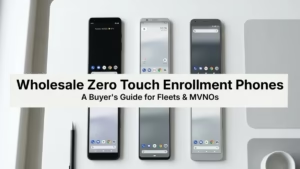
Android Zero-Touch enrollment lets you pre-configure devices so they automatically enroll in your MDM the moment an employee powers them on and connects to Wi-Fi. No IT hands-on-keyboard per device. You associate devices with your zero-touch account at the supplier level — which means if you’re buying from a zero-touch reseller, devices arrive essentially pre-enrolled. For Android fleets of any real size, this is the standard.
Samsung Knox Mobile Enrollment
Knox Mobile Enrollment is Samsung’s proprietary enrollment layer on top of Android Enterprise. It adds bulk device upload via IMEI, deeper hardware-level policy enforcement, and tighter integration with Samsung’s security stack. For heavily regulated environments — healthcare, government, financial services — Knox-validated devices give you more control than standard Android enrollment. Knox and zero-touch aren’t mutually exclusive; many business phone setups use both.
Apple Business Manager
Apple Business Manager is Apple’s equivalent — a web portal where you manage device enrollment, app licensing, and content distribution at the organizational level. Devices purchased through an ABM-authorized reseller get assigned to your MDM automatically. Employees don’t touch a setup assistant — they power on and land directly in a managed state.
The common thread across all three: they only work if your devices were sourced through the right channel. A carrier-locked device bought retail often can’t be enrolled via these methods, or requires extra steps that defeat the whole purpose.
Step 4: Configure Apps and Policies
Once enrollment is confirmed in a test environment, build out your configuration profiles. This is the layer most IT teams underestimate in terms of time.
Work through it in logical order:
- Security baseline first: screen lock, encryption, minimum OS version, certificate deployment.
- Network configs: Wi-Fi profiles, VPN, proxy settings — pushed silently, no employee action required.
- App deployment: required apps pushed automatically, optional apps available through a managed app catalog. Don’t push everything to everyone — scope apps to device groups or job roles.
- Restrictions: disable what doesn’t belong — USB debugging, app sideloading, unmanaged app installs — based on your compliance requirements and use case.
Document every policy decision and the reason for it. Six months from now, someone will ask why a particular restriction exists. If you don’t have a record, you’ll spend time reverse-engineering your own config.
Step 5: Stage and Kit Devices Before Deployment
Staging is the difference between a business phone setup that goes smoothly and one where you’re fielding calls from employees on day one because their phone isn’t configured right.
A proper staging process means: devices are enrolled, policies are applied, apps are downloaded and verified, and the device is confirmed in a known-good state before it ever leaves IT. Ideally you’re doing this in batches — power on a rack of devices, confirm enrollment, spot-check a sample for policy compliance, then box and label for distribution.
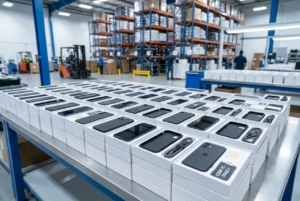
This is also where your supplier matters. Devices that arrive with a consistent hardware state — same firmware version, factory reset, no carrier pre-installs, QC-verified — stage predictably. Devices that arrive with inconsistencies introduce variables that slow everything down. Whether you’re sourcing new inventory or certified like-new devices, a 35-point QC inspection on every unit and a sub-1% return rate aren’t marketing numbers — they’re operational insurance for the staging step.
If your volume is high enough, ask your supplier about pre-enrollment staging — some can associate IMEIs with your zero-touch or Knox account before the devices even ship. That takes another step off your plate entirely.
Step 6: Employee Handoff and Documentation
The last step of any business phone setup is the one most IT teams rush, and it shows. A device handoff without documentation creates a support burden that accumulates over time.
At minimum, employees should receive:
- A one-page quick-start guide: how to access work apps, what IT manages on the device, who to call if something’s wrong.
- An acceptable use policy acknowledgment — signed, on file.
- Clear instructions on what to do if the device is lost, stolen, or damaged.
On the IT side, every issued device should be logged — serial number, IMEI, assigned user, enrollment date, configuration profile applied. If you’re using your MDM’s asset management features, this happens automatically. If not, a maintained spreadsheet is better than nothing.
Build a device return and offboarding process at the same time you build the handoff process. Wiping and re-enrolling returned devices is part of the lifecycle, not an afterthought.
One More Thing on the Procurement Side
Steps 1 and 5 get a lot easier when you’re working with a supplier that understands what MDM-ready actually means. Factory-unlocked devices, zero-touch and ABM eligibility confirmed before shipment, Knox-validated Samsung hardware, consistent QC across every unit in the order. For teams running a business phone setup anywhere from 10 to 10,000+ devices, that consistency is what makes a repeatable process actually repeatable.
If you’re building out your enterprise device program and want to see what fleet options make sense for your use case, the business phone comparison guide is a good starting point for narrowing down hardware before you go to procurement.
Frequently Asked Questions
What’s the best MDM platform for a mid-market Android deployment?
For organizations already in the Microsoft 365 ecosystem, Microsoft Intune is usually the path of least resistance. For Apple-heavy environments, Jamf is the standard. VMware Workspace ONE and SOTI are strong options for mixed fleets or more complex infrastructure requirements. The right answer depends on your OS mix, existing infrastructure, and your IT team’s familiarity — but confirm your chosen platform supports your planned enrollment methods before you’re halfway through a rollout.
What is Android Zero-Touch Enrollment?
It’s Google’s automatic enrollment for Android: devices bought from a zero-touch reseller enroll in your MDM on first boot, with no per-device IT work. For any Android fleet beyond a handful of devices, it should be your default.
What is Samsung Knox Mobile Enrollment?
It’s Samsung’s bulk enrollment layer on top of Android Enterprise, adding IMEI-based device upload and hardware-level policy control. Use it for Samsung fleets in regulated industries; it works alongside zero-touch, not instead of it.
What is Apple Business Manager?
It’s Apple’s portal for enrolling iPhones and iPads into your MDM automatically. Buy through an ABM-authorized reseller and devices arrive assigned to your MDM, so employees power on straight into a managed state.
Need MDM-ready devices staged and ready to ship?
We supply IT teams with bulk orders of factory-unlocked, Knox/zero-touch/ABM-ready devices — QC-inspected, consistently spec’d, 10 to 10,000+. No cart, no guessing on availability.
Get a Bulk Device QuoteBefore settling on a handset, it’s worth reviewing the tradeoffs in our comparison of WiFi phones vs DECT phones for business.
Getting the right hardware for your team starts with understanding your use case — see how wholesale phones built for employee communication differ from standard procurement buys.